Recent Storm Damage Posts
How to Prevent Winter Storm Damage in Your Sandy Home
1/20/2025 (Permalink)
 Prevent Winter Storm Damage in Sandy, UT.
Winter in Sandy, Utah, brings breathtaking snow-capped mountains, holiday festivities, and outdoor adventures, but it also presents unique challenges for homeowners. The winter months can be hard on your home, especially with the possibility of severe winter storms. These storms can bring heavy snow, freezing temperatures, high winds, and even flooding — all of which can cause significant damage if you're not properly prepared.
The good news is that with a little foresight and preparation, you can reduce the risk of winter storm damage to your home. SERVPRO® of Sandy is here to share practical steps that will help you safeguard your property and keep your home safe and dry all winter long.
1. Inspect Your Roof and Gutters
Your roof is your first line of defense against the harsh winter weather, so it’s important to ensure it’s in good condition before the snow and ice arrive.
What to do:
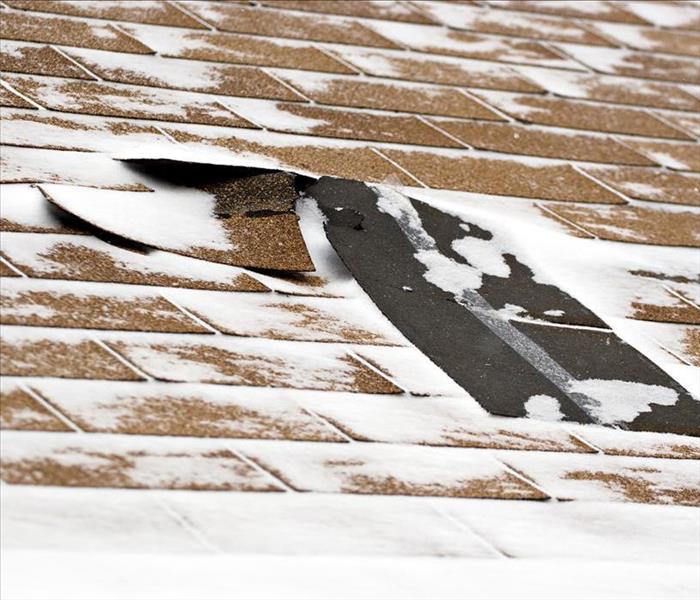
- Check for missing or damaged shingles: A damaged roof can allow water to seep into your home, causing leaks and extensive damage to your attic, walls, and ceilings.
Inspect the flashing around chimneys, - vents, and skylights: These areas are particularly prone to leaks in winter. Make sure the flashing is secure and intact to prevent water from infiltrating.
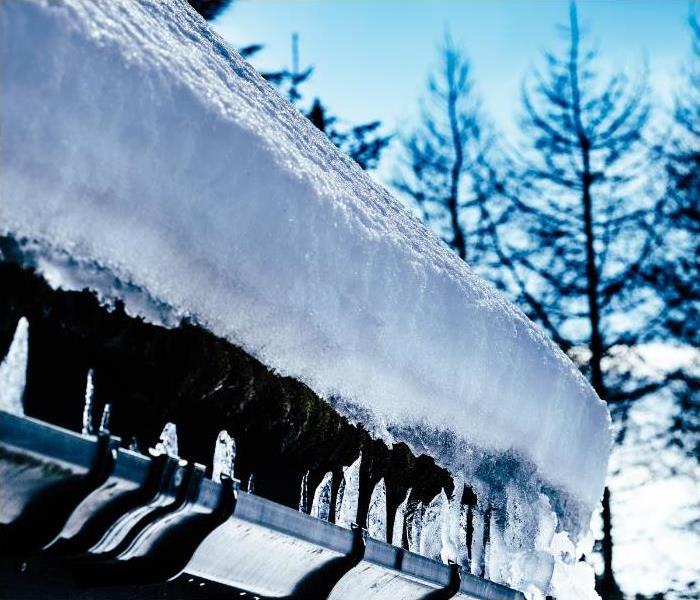
- Clean your gutters: Clogged gutters can lead to ice dams, which occur when melting snow refreezes at the edge of the roof, causing water to back up and leak into your home. Make sure your gutters are free of leaves, twigs, and debris so that water can flow freely.
- Trim overhanging branches: Heavy snow and ice can weigh down tree branches, causing them to break and potentially fall on your roof. Trim any branches that are hanging too close to the roofline.
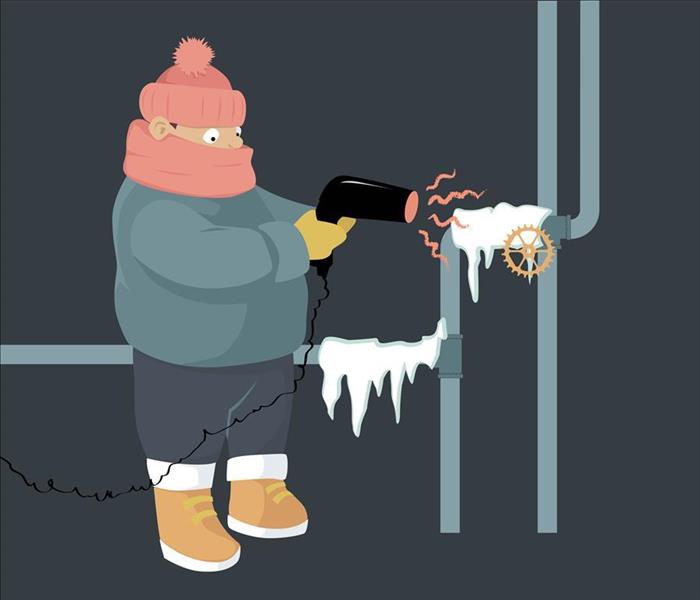
2. Winterize Your Pipes
Frozen pipes are a leading cause of water damage during the winter months. In Sandy, where temperatures can dip well below freezing, it’s especially important to take precautions to prevent your pipes from freezing and bursting.
What to do:
- Insulate exposed pipes: Pipes in attics, basements, and crawl spaces are particularly vulnerable to freezing. Insulate these pipes with foam or heat tape to help protect them from the cold.
- Let faucets drip: During extremely cold temperatures, allowing faucets to drip slightly can prevent pressure from building up inside the pipes and potentially causing them to burst.
- Seal air leaks: Check for gaps around windows, doors, and vents that could allow cold air to reach your pipes. Use caulk or weatherstripping to seal these gaps.
- Shut off exterior water sources: Disconnect garden hoses and drain outdoor faucets to prevent water from freezing inside the pipes.
3. Prepare for Snow and Ice Removal
Heavy snow accumulation and ice buildup can put a strain on your home’s structure and can also create hazardous conditions around your property. Proper snow and ice removal is key to preventing winter storm damage.
What to do:
- Keep snow from piling up on your roof: If your roof has a steep pitch, it may be difficult to remove snow yourself. If not, use a roof rake with a long handle to carefully remove snow from the eaves. This will help prevent ice dams and reduce the weight on the roof.
- Shovel your driveway and walkways regularly: This will not only prevent accidents but also keep ice from accumulating and causing structural stress on your home.
- Salt or sand high-traffic areas: Use ice melt or sand on your driveway, sidewalks, and steps to prevent ice from forming and creating slippery spots. Be sure to use an ice melt that’s safe for pets and plants.
4. Seal Your Home Against Cold Air
Keeping your home warm during winter storms can be challenging if there are drafts or gaps allowing cold air to infiltrate. Proper insulation and weatherproofing can make your home more energy-efficient, reduce your heating costs, and prevent ice and water damage.
What to do:
- Check for air leaks: Walk around your home and look for gaps around windows, doors, and electrical outlets. Seal these gaps with caulk or weatherstripping to prevent cold air from getting inside.
- Insulate your attic: Proper insulation in your attic can help prevent ice dams and keep your home warmer during winter storms. If your attic isn’t adequately insulated, consider adding more insulation to improve energy efficiency.
- Replace weatherstripping on doors and windows: If you notice that the weatherstripping around your doors and windows is worn out or cracked, replace it to keep the cold air out and the warmth in.
5. Maintain Your Heating System
Your furnace or heating system is essential for keeping your home comfortable and safe during winter storms. A malfunctioning heating system can lead to frozen pipes, increased risk of fires, and even carbon monoxide poisoning.
What to do:
- Schedule an annual furnace inspection: Before winter sets in, have your furnace inspected and serviced by a professional to ensure it’s working properly.
- Change your air filters: Clogged filters can restrict airflow and cause your heating system to work harder, which could lead to malfunctions or a breakdown. Change your filters regularly to maintain efficient operation.
- Test your smoke and carbon monoxide detectors: The winter months are a time when heating systems can cause hazardous situations like fires or carbon monoxide leaks. Test your detectors and change the batteries to ensure they’re working properly.
6. Prepare for Power Outages
Winter storms can often result in power outages, especially with the added weight of snow and ice on power lines and trees. Preparing for potential outages will help you stay safe and comfortable during the storm.
What to do:
- Stock up on emergency supplies: Keep a supply of non-perishable food, bottled water, flashlights, batteries, blankets, and other essentials in case of a prolonged power outage.
- Have a backup generator: If you live in an area prone to power outages, consider investing in a backup generator to keep your essential appliances running.
- Unplug electrical appliances: During a power outage, surges can damage electronics. Unplug any sensitive devices to prevent damage when the power is restored.
7. Review Your Homeowners Insurance Policy
Finally, it’s important to review your homeowners insurance policy to ensure that it covers winter storm damage. Many policies include coverage for snow and ice damage, but you may want to verify this and check for any exclusions or limitations.
What to do:
- Check for adequate coverage: Make sure your policy covers roof damage, water damage from burst pipes, and storm-related damage.
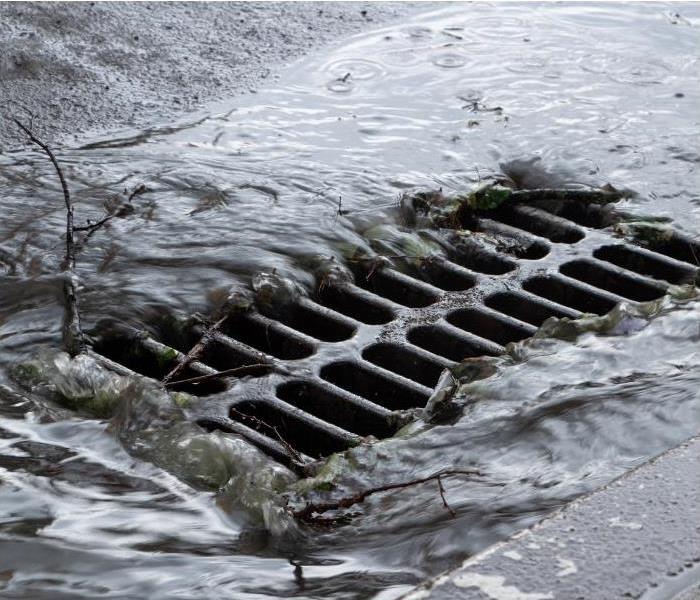
- Consider flood insurance: If you live in a flood-prone area, it’s worth looking into flood insurance, as standard homeowners policies don’t always cover flood-related damages.
Preparing your home for winter storms in Sandy, UT, is essential to preventing damage and keeping your family safe. By taking these preventative measures — from inspecting your roof and gutters to preparing for power outages — you can ensure your home remains secure, warm, and safe through the cold winter months.
In the event that winter storm damage does occur, SERVPRO® of Sandy is here to help with professional restoration services. Whether you need water damage cleanup, mold remediation, or fire damage restoration, our team is ready to restore your home “Like it never even happened.” Stay safe, and don’t hesitate to call us for assistance!
The Unseen Dangers of Natural Flooding in Sandy, UT: Why It's More Troublesome Than Indoor Water Damage
8/28/2024 (Permalink)
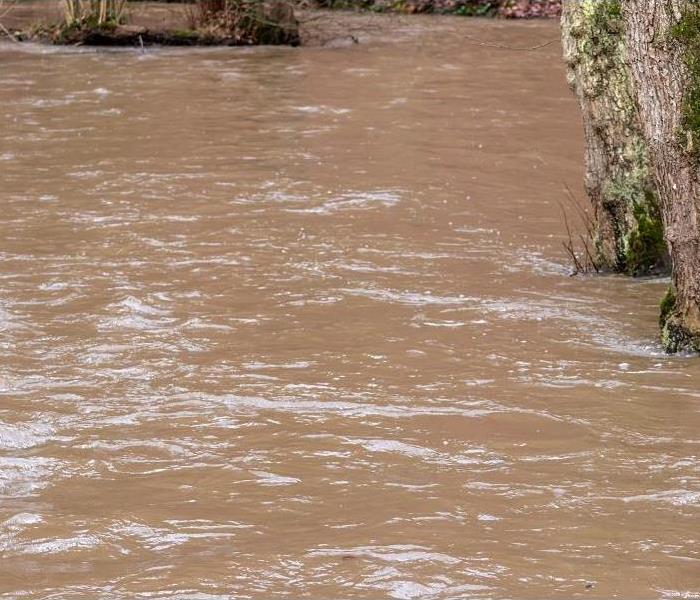
 Flooding in Sandy, UT
When disaster strikes, and your Sandy, UT, home is affected by water damage, it can be a distressing experience. However, not all water damage is created equal. The source of the water that invades your home plays a crucial role in determining the severity and complexity of the damage. Flooding from natural sources, such as heavy rainfall or a river overflowing its banks, presents a far greater challenge than water damage from a broken pipe or an overflowing dishwasher. The reason lies in the multiple contamination sources and the potential long-term consequences that natural flooding can bring.
The Differences Between Clean Water Damage and Natural Flooding
Water damage from a broken pipe or an overflowing dishwasher typically involves "clean water," meaning it comes from a sanitary source. While clean water can still cause significant damage if not promptly addressed, the risks are relatively lower compared to natural floodwaters. Clean water damage is generally classified as Category 1 water, which poses little to no immediate health risk.
In contrast, natural flooding introduces a host of contaminants into your home. Floodwaters often carry a mix of debris, chemicals, sewage, and biological contaminants, making the situation much more hazardous. This type of water damage is classified as Category 3 water, also known as "black water," due to the high level of contamination it contains. The presence of these contaminants not only complicates the cleanup process but also poses serious health risks to you and your family.
The Health Risks Associated With Natural Flooding
When your home is flooded by natural sources, the water is not just water—it's a toxic mixture of pollutants that can have serious implications for your health. Contaminants found in natural floodwaters may include:
Sewage: Floodwaters often overwhelm sewer systems, leading to the release of raw sewage into the environment. This sewage can contain harmful pathogens such as bacteria, viruses, and parasites that can cause illnesses like gastroenteritis, hepatitis, and respiratory infections.
Chemical Contaminants: Floodwaters can pick up chemicals from agricultural runoff, industrial sites, and even household products. These chemicals can be toxic and may cause skin irritation, respiratory issues, and long-term health effects if you are exposed to them.
Mold and Mildew: The presence of moisture in your home after a flood creates an ideal environment for mold and mildew growth. These fungi can spread quickly, producing spores that can cause allergic reactions, asthma attacks, and other respiratory problems.
Debris and Sharp Objects: Floodwaters often carry debris, including sharp objects like glass, metal, and wood. These can cause physical injuries if you come into contact with them during cleanup efforts.
Given these risks, it is crucial to approach natural flooding with caution and prioritize professional assistance to ensure your home is thoroughly decontaminated and safe to inhabit.
Structural Damage and Long-Term Consequences
The water from a broken pipe or an overflowing dishwasher typically stays confined to certain areas of your home and can be cleaned up relatively quickly if addressed promptly. On the other hand, natural flooding is far more invasive. Floodwaters can infiltrate every nook and cranny of your home, seeping into walls, floors, and even the foundation. This widespread infiltration can lead to severe structural damage that may not be immediately apparent.
Foundation Damage: Natural flooding can cause erosion of the soil around your home's foundation, leading to shifts and cracks that compromise the structural integrity of your home. Over time, this can result in uneven floors, cracked walls, and even the risk of a partial or total collapse of the structure.
Wood Rot and Warping: Prolonged exposure to water causes wood to rot and warp. This can weaken the structural elements of your home, such as beams, joists, and framing, leading to expensive repairs and potential safety hazards.
Electrical System Damage: Floodwaters can easily short-circuit your home's electrical system, creating a fire hazard and necessitating extensive repairs or replacements. It is essential to have a qualified electrician inspect your electrical system after a flood to ensure it is safe.
Hidden Mold Growth: As mentioned earlier, natural flooding creates an environment conducive to mold growth. However, mold doesn’t always appear in visible areas. It can thrive behind walls, under floors, and in other hidden spaces, posing a long-term health risk if not properly remediated.
The Importance of Professional Restoration Services
Dealing with natural flooding requires a level of expertise and equipment that goes beyond the capabilities of a typical homeowner. Professional restoration services, such as those offered by SERVPRO®, are essential for addressing the complexities of natural flood damage. Here’s why:
Thorough Assessment and Water Extraction: SERVPRO professionals begin by assessing the extent of the damage and identifying all areas affected by floodwaters. Using advanced water extraction equipment, they remove as much water as possible to minimize further damage.
Decontamination and Sanitization: Given the contamination present in natural floodwaters, thorough decontamination is crucial. SERVPRO uses industry-approved techniques and EPA-registered disinfectants to sanitize your home, ensuring that all harmful pathogens and chemicals are eliminated.
Mold Remediation: SERVPRO professionals are trained to identify and remediate mold growth. They use specialized equipment to detect hidden moisture and apply effective mold remediation techniques to prevent further spread and ensure a safe living environment.
Structural Drying and Repair: After water extraction and decontamination, SERVPRO uses industrial-grade drying equipment to remove remaining moisture from your home. They also assess and repair any structural damage, including foundation issues, wood rot, and electrical system concerns.
Restoration and Reconstruction: In cases of severe damage, restoration may involve reconstruction of certain areas of your home. SERVPRO provides comprehensive services, including rebuilding and restoring your home to its pre-flood condition.
Natural flooding is a serious event that can have far-reaching consequences for your home and your health. The contamination from multiple sources, combined with the potential for extensive structural damage, makes it a far more challenging situation than dealing with water damage from a clean source like a broken pipe or dishwasher overflow. When faced with natural flooding, it’s essential to seek professional help to ensure that your home is thoroughly decontaminated, repaired, and restored.
In Sandy, UT, SERVPRO is your trusted partner in flood damage restoration. Our team of professionals is equipped with the knowledge, tools, and experience to handle the complexities of natural flood damage, ensuring that your home is safe and restored to its original condition. When disaster strikes, don’t hesitate to reach out to SERVPRO for the help you need.
A Look into SERVPRO's Storm Damage Restoration Process in Sandy, UT
7/5/2024 (Permalink)
 Storm Damage Restoration in Sandy, UT
In the serene suburbs of Sandy, Utah, the tranquility of everyday life can sometimes be disrupted by the unpredictable forces of nature. From sudden thunderstorms to heavy snowfall, the residents of Sandy know all too well the impact that severe weather can have on their homes and communities. When disaster strikes, one company stands ready to restore hope and repair the damage: SERVPRO.
Understanding the Impact of Storm Damage
The aftermath of a storm can leave a trail of destruction in its wake. From flooded basements to damaged roofs and everything in between, storm damage can vary widely in its severity and scope. In Sandy, where the weather can change dramatically throughout the year, homeowners and businesses alike face the constant threat of wind, rain, and snow wreaking havoc on their properties.
Immediate Response and Assessment
SERVPRO's storm damage restoration process begins with a swift response. When a call comes in, their team mobilizes quickly to assess the situation and determine the necessary steps to mitigate further damage. In Sandy, where time is often of the essence due to the rapid onset of weather-related issues, this prompt response is crucial in preventing secondary damage such as mold growth or structural instability.
Upon arrival, SERVPRO technicians conduct a thorough inspection of the property. This assessment includes identifying areas that have been directly impacted by the storm, evaluating the extent of the damage, and developing a comprehensive restoration plan tailored to the specific needs of the property.
Water Extraction and Drying
One of the most common issues homeowners face after a storm is water damage. Whether it's from a burst pipe, a leaking roof, or flooding, excess water can quickly seep into walls, floors, and furniture, causing extensive damage if not promptly addressed.
SERVPRO utilizes state-of-the-art equipment for water extraction and drying. Powerful pumps and vacuums are employed to remove standing water swiftly and efficiently. Moisture meters and infrared cameras are used to detect hidden moisture pockets that could lead to future problems if left untreated. Once excess water has been removed, industrial-grade dehumidifiers and air movers are brought in to dry the affected areas thoroughly.
Restoration of Structural Damage
In cases where storms have caused structural damage, such as compromised roofs or weakened walls, SERVPRO's team of skilled professionals in Sandy are equipped to handle even the most challenging repairs. They work closely with local contractors and engineers to ensure that all repairs are completed to code and restore the structural integrity of the property.
From boarding up windows to tarping roofs, SERVPRO takes immediate action to secure the property and prevent further damage. Their goal is not only to restore the home or business to its pre-storm condition but also to provide peace of mind to property owners during the restoration process.
Cleaning and Content Restoration
Storm damage often leaves behind a trail of debris and contamination. SERVPRO's cleaning services extend beyond just removing visible dirt and debris. They employ specialized techniques and cleaning agents to sanitize and deodorize affected areas. Upholstery, carpets, and other belongings damaged by water or debris are carefully cleaned and restored whenever possible.
For items that require off-site restoration, SERVPRO offers pack-out services. This involves carefully packing and transporting belongings to a secure facility where they can be cleaned, dried, and restored using advanced techniques.
Community Support and Rebuilding Together
Beyond their technical expertise, SERVPRO is committed to supporting the Sandy community during times of crisis. They collaborate with local authorities, insurance companies, and community organizations to streamline the restoration process and ensure that homeowners and businesses receive the assistance they need promptly.
SERVPRO's involvement goes beyond restoring individual properties; they contribute to rebuilding the community as a whole. Whether through sponsoring local events or providing educational resources on disaster preparedness, SERVPRO strives to strengthen community resilience in Sandy and beyond.
In Sandy, Utah, where the beauty of nature meets the unpredictability of the weather, SERVPRO stands as a beacon of hope for homeowners and businesses facing the aftermath of storms. Through their meticulous storm damage restoration process, they not only repair physical damage but also restore peace of mind to those affected. From immediate response and assessment to comprehensive restoration and community support, SERVPRO's commitment to excellence shines through in every storm they encounter. When disaster strikes, Sandy residents can rest assured that SERVPRO will be there, ready to restore their homes and their lives.
A Guide to Dealing with Frozen Pipes in Sandy, UT
12/27/2023 (Permalink)
 Frozen pipes in Sandy, UT.
Sandy, UT, with its breathtaking landscapes and serene winters, is a haven for those who appreciate the beauty of the season. However, as temperatures drop, residents are faced with the challenge of protecting their homes from the harsh effects of winter, including the dreaded issue of frozen pipes. In this comprehensive blog post, we will delve deeper into the nuances of dealing with frozen pipes in Sandy and explore a range of preventative measures and practical tips to help you navigate this winter woe effectively.
Understanding the Enemy:
Before we dive into the solutions, it's crucial to understand why pipes freeze and the potential consequences. When temperatures plummet, water inside pipes can freeze, causing them to expand. This expansion can lead to a build-up of pressure within the pipes, risking cracks or even bursts. The consequences are not only inconvenient but can result in costly repairs and water damage to your property.
Preventative Measures:
Insulation is Your Ally: The first line of defense against frozen pipes is proper insulation. Identify exposed pipes in your home, particularly those in unheated or exterior areas, and insulate them using pipe sleeves or heat tape. By adding an extra layer of protection, you create a barrier that helps retain the heat within the pipes, preventing them from freezing.
Seal the Gaps: Cold drafts can find their way into your home through gaps around doors and windows. Inspect these areas and seal any openings to prevent the intrusion of frigid air. Weatherstripping and caulking are effective tools in fortifying your home against the winter chill.
Keep the Heat On: It may be tempting to turn down the thermostat to save on energy costs, especially when you're away. However, maintaining a consistent indoor temperature is crucial in preventing frozen pipes. Set your thermostat to a level that keeps your home comfortably warm, even when you're not there. This steady warmth provides a vital layer of protection for your plumbing.
Let the Faucets Drip: On exceptionally cold nights, allowing faucets connected to vulnerable pipes to drip slowly can be a game-changer. The movement of water, even at a minimal flow, helps prevent it from stagnating and freezing within the pipes. This simple yet effective technique is particularly useful during extreme cold spells.
Cabinet Doors Open: In areas where plumbing is located inside cabinets, such as under sinks, consider opening the cabinet doors during cold weather. This allows warm air to circulate around the pipes, reducing the chances of them freezing. It's a small adjustment that can make a significant difference in maintaining the warmth needed to prevent freezing.
Thawing Frozen Pipes:
Despite your best efforts, frozen pipes may still occur. When faced with this situation, it's essential to know how to thaw them safely to avoid causing further damage.
Locate the Frozen Section: If you suspect a pipe is frozen, the first step is to identify the affected area. This may involve checking exposed pipes in unheated areas, such as basements, crawl spaces, or attics.
Apply Gentle Heat: Once the frozen section is identified, the next step is to apply gentle heat. This can be achieved using a hairdryer, heat lamp, or towels soaked in hot water. It's crucial to start at the end closest to the faucet to allow water to flow out as the ice melts.
Avoid Open Flames: While heat is essential for thawing pipes, it's crucial to avoid using open flames or high-intensity heat sources. These can damage the pipes and pose a significant safety risk. Stick to safer alternatives such as electric heating tools designed for this purpose.
Patience is Key: Thawing frozen pipes requires patience. Rushing the process can lead to complications. Allow the heat to work gradually, and monitor the thawing progress to ensure a steady and controlled resolution.
When to Seek Professional Assistance:
While many instances of frozen pipes can be handled with the tips mentioned above, there are situations where professional assistance is warranted.
Persistent Issues: If you find yourself dealing with persistent issues of frozen pipes despite taking preventive measures, it's time to consult a licensed plumber. A professional can conduct a thorough assessment of your plumbing system, identify any underlying problems, and implement effective solutions.
Uncertain Situations: If you're unsure about how to handle frozen pipes or suspect more extensive damage, it's best to err on the side of caution and seek professional help. Ignoring potential issues can lead to further damage and increased repair costs.
As winter settles into Sandy, UT, the idyllic landscapes may be accompanied by the challenges of frozen pipes. However, armed with the knowledge of preventative measures, effective thawing techniques, and the wisdom to seek professional help when needed, residents can confidently face the winter season. Remember, the key lies in preparation and a proactive approach. By taking these steps, you not only protect your home from the inconvenience of frozen pipes but also ensure a cozy and worry-free winter. Stay warm, stay informed, and let the beauty of winter in Sandy be a source of joy, not plumbing headaches.
Winterizing Your Home in Sandy, Utah: A Comprehensive Guide to Protecting Your Investment
11/9/2023 (Permalink)
 Inspect and repair your roof now to avoid damage during winter season in Sandy, UT.
Winter in Sandy, Utah, with its picturesque snow-covered landscapes and crisp air, brings a unique charm to the region. However, the beauty of the season also comes with challenges for homeowners, as the cold temperatures and winter storms can pose risks to property and infrastructure. To ensure your home stays warm, cozy, and damage-free throughout the winter season, here's a detailed guide on how to prepare for winter in Sandy, Utah.
10 Steps To Prepare Your Home For Winter
1. Sealing the Envelope: Inspect and Seal Windows and Doors
One of the first steps in winter preparation is to inspect your home's envelope for potential drafts. Cold air seeping in through gaps around windows and doors can significantly impact your home's energy efficiency. Conduct a thorough examination, checking for any cracks, gaps, or leaks. Seal these openings with weatherstripping or caulking to create a tighter seal, preventing cold air from entering and warm air from escaping. This simple yet effective measure not only keeps your home warmer but also helps reduce energy costs during the winter months.
2. Gutter Maintenance: Cleaning and Inspection
Proper gutter maintenance is essential to prevent water-related issues during winter. Clogged gutters can lead to ice dams, causing water to back up and potentially damage your roof and interior. Before winter arrives, clean out any debris from gutters and downspouts. Ensure that water can flow freely to prevent ice buildup. Consider installing gutter guards to minimize debris accumulation, reducing the frequency of cleanings. This proactive approach to gutter maintenance will safeguard your home from the potential hazards of ice dams and water damage.
3. Protecting Your Pipes: Insulation and Prevention
Frozen pipes can result in extensive damage and costly repairs. To prevent this winter nightmare, insulate exposed pipes in areas such as attics, basements, and crawl spaces. Use pipe insulation sleeves or heat tape to provide an extra layer of protection. During extremely cold nights, let faucets drip to keep water flowing, reducing the risk of freezing. Familiarize yourself with the location of your water shut-off valve, as knowing how to quickly turn off the water supply can mitigate potential damage in case of a pipe burst. Taking these measures ensures that your plumbing remains intact and functional throughout the winter.
4. Heating System Maintenance: Schedule a Professional Inspection
A reliable heating system is paramount for a comfortable and safe winter. Schedule a professional inspection of your furnace before the cold sets in. A qualified technician can identify and address any issues, ensuring that your heating system operates efficiently throughout the winter months. Regular maintenance not only enhances performance but also reduces the risk of unexpected breakdowns. Additionally, changing the furnace filter and checking the thermostat settings contribute to a more energy-efficient and cost-effective heating system.
5. Winterizing Outdoor Plumbing: Preventing Frozen Pipes
Outdoor plumbing, such as hoses and water valves, requires special attention before winter arrives. Disconnect and drain outdoor hoses to prevent freezing, as frozen water in hoses can lead to pipe damage. Shut off outdoor water valves and drain any remaining water to eliminate the risk of frozen pipes. By winterizing your outdoor plumbing, you safeguard these vulnerable components from the effects of cold temperatures, reducing the likelihood of burst pipes and water damage.
6. Roof Integrity: Inspect and Repair
Your roof is the first line of defense against winter weather. Inspect it for any damaged or missing shingles, as these vulnerabilities can lead to leaks and water damage. Snow and ice can exacerbate existing issues, making proactive roof maintenance crucial. Address any identified problems promptly to ensure your roof remains in top condition throughout the winter season. Investing time in roof inspection and repair now can save you from more extensive and costly repairs in the future.
7. Stock Up on Winter Supplies: Essentials for Snowy Days
Being prepared for winter storms is essential for maintaining both safety and comfort. Stock up on winter supplies, including rock salt, sand, and snow shovels. These items are crucial for quickly clearing walkways and driveways after snowfall, minimizing the risk of slips and falls. Keep these supplies easily accessible, and consider creating a designated storage area for winter essentials. Proactive preparation ensures that you're ready to tackle winter weather challenges and maintain a safe and navigable outdoor space around your property.
8. Pruning and Trimming: Protecting Against Winter Weight
Heavy snow and ice can weigh down tree branches, posing a risk to your home and property. Prune trees and trim branches, especially those close to your house. This preventive measure reduces the likelihood of branches breaking under the weight of winter precipitation. By addressing potential hazards before winter storms hit, you minimize the risk of damage to your roof, windows, and other structures. Regular tree maintenance not only protects your property but also contributes to the overall safety and aesthetics of your outdoor space.
9. Create an Emergency Kit: Preparedness for Unexpected Events
Winter weather can bring unexpected challenges, from power outages to impassable roads. Prepare for such scenarios by assembling an emergency kit. Include items such as flashlights, batteries, blankets, non-perishable food, and a first aid kit. Having these essentials on hand ensures that you're ready to face unexpected situations with confidence. Regularly check and update your emergency kit to ensure that all items are in good condition and within their expiration dates. Being well-prepared allows you to navigate winter storms with resilience and ensures the safety and well-being of your household.
10. Stay Informed: Weather Awareness for Proactive Planning
Knowledge is a powerful tool in winter preparedness. Stay informed about local weather forecasts, advisories, and warnings. Regularly check reliable weather sources to stay ahead of upcoming storms and extreme weather events. Being aware of potential challenges allows you to take necessary precautions, plan accordingly, and respond effectively to changing conditions. Whether it's adjusting your schedule to avoid hazardous travel times or taking additional precautions around the home, staying informed is a key component of a comprehensive winter preparedness strategy.
In conclusion, preparing your home for winter in Sandy, Utah involves a combination of proactive measures and regular maintenance. By sealing your home's envelope, maintaining gutters, protecting pipes, servicing your heating system, winterizing outdoor plumbing, inspecting your roof, stocking up on winter supplies, pruning trees, creating an emergency kit, and staying informed about weather conditions, you can safeguard your investment and ensure a comfortable and worry-free winter season. Taking these steps not only protects your property but also contributes to the overall safety and well-being of your household during the winter months. Stay warm, stay safe, and embrace the beauty of winter in Sandy, Utah.
The Importance of a Professional Category 3 Flooding Response
7/20/2022 (Permalink)
 Know the different categories of flooding waters.
The damage to your home after flooding from natural sources is much more troublesome than the damage that occurs after a broken pipe or overflowing dishwasher. When your Sandy, UT, home is subjected to rising water from heavy rainfall or a river that has grown past its banks, you’re dealing with contamination from multiple sources.
Distinguish Between Category 1 and Category 3 Flooding
Water is one of the number one causes of damage to homes and accounts for some of the most frequent insurance claims. However, not all water damage is the same. There are three categories to label the risks associated with encroaching water:
- Category 1 or Clean Water comes from sanitary sources, such as the water supply line in your kitchen or from rainwater. You may not want to drink this water, but there’s very little risk to you when you’re exposed to it.
- Category 2 or Gray Water comes from less sanitary sources, such as an overflowing toilet bowl or a broken aquarium. This water is contaminated and poses some risk. Cleaning and restoration professionals generally treat this type of damage with anti-microbial sprays and other disinfectants.
- Category 3 or Black Water is highly contaminated. This water may come from rivers, seas, or sewage lines. Windblown rainwater may also fall in this category. This water carries and picks up multiple contaminants from many sources of pollution, including feces, toxic chemicals, and pathogens.
Category 1 Flood Cleanup
When your home is flooded from a break in a pipe or melting snow, the cleanup steps are straightforward:
- Shut off the water and power.
- Remove everything within the exposed area.
- Extract water and thoroughly dry the affected rooms.
- Disinfect the area.
- Complete repairs and restoration.
Professionals and homeowners may work together to address Category 1 flood damage because there is limited risk associated. It is worth pointing out that Category 1 water contamination could worsen if not addressed promptly. As water sits, it absorbs chemicals and contaminants from carpeting, furniture, and other materials throughout the home until eventually qualifying as Category 2 or 3.
Category 3 Flood Cleanup
When flood water is full of hazardous pollutants, it poses significant risks. This necessitates the use of personal protective equipment by trained water damage cleanup professionals. This gear may include tall boots, a protective jumpsuit, gloves, and face masks. Storm damage restoration requires all the steps of Category 1 cleanup and also calls for professional removal of contaminated materials. Professionals provide a specialized response depending on the source of water, i.e., sewer lines, seawater, and river water. You should not try to clean up this wastewater on your own. Any contaminants absorbed by the structural components and furnishings of your home could lead to secondary damage and lingering effects such as stains and unpleasant smells.
Your insurance provider may recommend professionals to address Category 3 flooding, and you should never attempt this on your own. It is possible that you could clean up Category 1 damage or assist cleanup technicians but contact your insurance provider first. It is often the case that professional cleanup is faster, more complete, and less likely to cause further harm.
Can Solar Panels Weather Storm Forces?
5/30/2022 (Permalink)
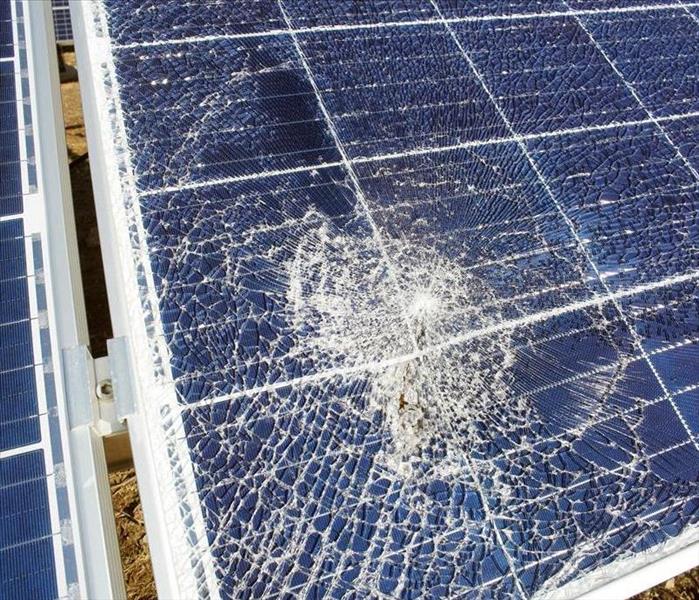 Follow our Tips and Learn More about Solar Panels in your Property.
Your home is likely to do well in a storm; however, a few factors could impact water defense and solar function. Is it strong enough to fight off hail and water trouble? Hailstones alone can range from miniature to the size of large fruit, packing quite a punch when it impacts structure.
Therefore, homeowners in Sandy, UT, may worry about panel damage and the costs of repairing the home and solar materials. Are your panels durable enough to handle intense forces? Understand the factors that influence damage.
Important Questions to Consider
What Could Cause a Problem?
Several elements pose a threat to solar panels. Hail, debris and water are the three primary culprits of trouble. During a hail storm, the moisture freezes, creating balls of ice. These irregular formations fall to the Earth and pack a serious punch. How hard it hits depends on air resistance and gravitational force. In fact, according to Wikipedia, hail can fall anywhere between 20 and 110 mph. This natural phenomenon is nothing to joke about.
Homeowners should also remain vigilant about the placement of trees. Broken branches or falling objects such as acorns and pinecones could scratch the panel surfaces. These scratches interfere with energy production, but their harm is not always easily discernible.
Finally, solar companies seal panels during installation. This permeable barrier keeps water out and secures the roof from saturation. However, if the wear deteriorates from wear and tear or excessive snow and water, fluid could breach the panels, seeping into the ceiling. This event leaves the property vulnerable to rot, mildew and mold.
How Does Design Influence Panel Damage?
Solar companies understand that their product has severe impact and conditions, so they use durable materials and test their panels to ensure they work against the elements. The industry wants to satisfy customers and avoid constant replacements and repairs. Therefore, they strive to invent and improve their concepts to combat external threats.
Hail, for instance, comes at random. It's unpredictable. However, when a storm comes through, it rages. Panels undergo thorough testing to survive a storm with minimal harm. Many operations select materials that can withstand intense forces. Panels can survive hail in most cases. They are hardy enough to take the beating. However, owners may find cracks if hailstones continuously hit one spot, increasing pressure.
What Should You Do When You Find an Issue?
Be aware of possible roof damage. Have regular inspections with your solar panel specialists and licensed roofers, determining whether your panels and rooftop are in good condition. Furthermore, immediately contact a water damage remediation in Sandy, UT, to assess any possible water infiltration.
It's critical to perform an immediate assessment, determining the extent of dampness and possible mold growth. The trained crew has specialized equipment to help dry out the facility, tear out contaminated pieces and restore the premises to good condition. Catch problems early. Otherwise, the situation exacerbates, creating more headaches and work for you and your restoration crew.
Solar companies work hard to deliver quality products that survive harsh storms. However, sometimes even the best materials get harmed. Panel damage can happen. Remain proactive about inspecting your roofing and work with professionals to correct any trouble immediately.
What Is an Ice Dam and Can I Prevent It
2/23/2022 (Permalink)
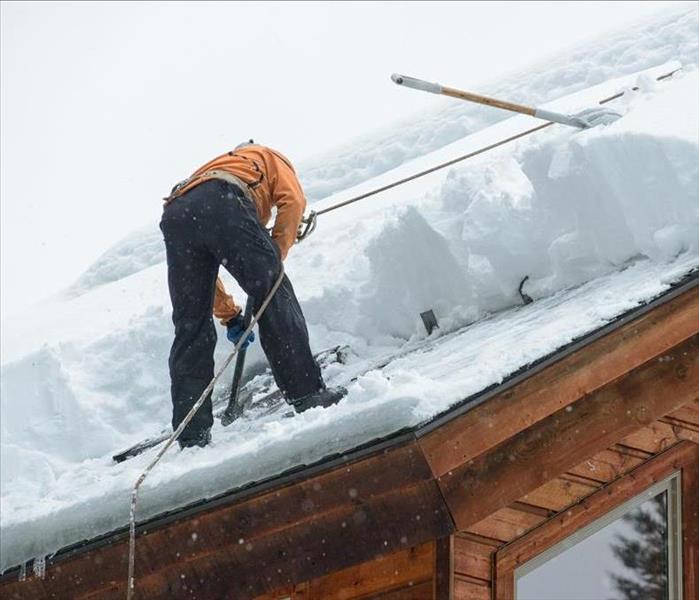 Prevent Ice Dam and be Ready for Winter Storms in your Sandy, UT property by following These Tips.
Winter in Sandy, UT, is not for the faint of heart. Many days, you probably begin by dealing with the snow that piled up overnight. This work takes time and zaps your energy as you snow blow and shovel it off the driveway, not to mention having to scrape it off your car. While it probably won't risk making you late for work as the snow on the ground, an ice dam can be a significant problem during a winter storm.
Ice dams are formed when ice accumulates on a home's eves, creating a ridge. This ridge traps the water from melting snow, preventing it from quickly draining from the roof. Then, the water can refreeze. The freezing backup can cause roof issues and indoor water intrusion problems that often lead to water damage to attics, insulation, ceilings, and walls.
Additionally, water leaks can lead to secondary damage such as mold. The mold infestation can turn out to be an even bigger problem than the original ice and water.
How Can I Prevent Ice Dams at My Home?
By controlling the amount of heat that escapes through the home's roof, you can reduce your risk of ice dams. There are several ways to do this.
1. Control the Home's Upward Airflow
Prevent air from leaking through the ceiling into the attic. Most homes have small gaps in the walls and ceiling from which air can escape. You can do this by creating an air-tight seal around all leakage paths. This action will prevent warm, humid air from rising to the attic.
2. Increase the Home's Insulation
Ice dams can be significantly reduced by adding insulation in your home's ceiling and roof areas. This insulation will help keep the warm air inside the house, preventing it from warming the roof. You can hire water damage mitigation specialists to perform an inspection to make sure you are leak-free and ready for the next winter storm.
3. Repair Roof Issues
A damaged roof or even missing shingles can provide more opportunity for heat to transfer from the indoors to the outside of the roof. Have your roof inspected regularly and repair any issues immediately.
4. Add Vents to the Roof and Soffits
Sometimes adding vents to the roof and soffits can be a great help if you still have some uncontrolled airflow. They will operate by pushing the warm air out of the roof while pulling the cold air inside. If you are still experiencing roof issues when it snows, you can often get a step ahead of the game by utilizing a snow rake. A snow rake is a tool made for pulling the snow down from a roof. Raking your roof at least once during a winter storm can prevent snow from piling up. Just be careful when performing this job, as you can get injured by the influx of falling snow and ice.
With these tips, you can prevent an ice dam. By implementing these suggestions now, you can avoid some potentially costly damage. Begin today planning for your next heavy snow. In the meantime, check with your insurance agent to verify that your homeowner's insurance includes ice dam coverage.
The Benefits of Installing Storm Shutters
2/13/2022 (Permalink)
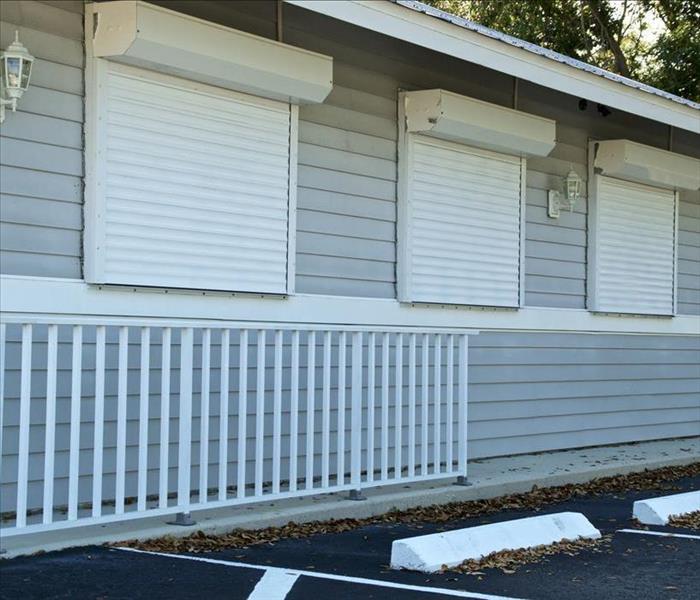 Storm shutters can improve safety in your home.
Do you live in an area prone to high winds or intense storms, like hurricanes and tornadoes? If so, you might want to invest in permanent storm shutters. Sure, you can use plywood or other temporary coverings, but they take time to deploy, and sometimes, time is not on your side.
Installing permanent shutters is an excellent way to ensure rapid deployment when the weather takes a turn for the worse. Many storm remediation services in Sandy, UT, will explain that there are at least four benefits to installing such tools.
4 Benefits to Installing Storm Shutters
1. Improved Safety
The primary reason to install shutters is for safety. With the tools permanently attached to your house, they are easy to move into position when a storm is rolling in, even if you are given little warning.
Window coverings like these, typically made of metal or other solid materials, help to eliminate the danger to people inside the house. The windows are less likely to shatter because of high winds or flying debris, meaning people inside are less likely to be injured during a storm.
2. Improved Curb Appeal
If you have ever driven through an area preparing for a possible hurricane, you will notice that most homes have plywood covering vulnerable areas like windows. Plywood is not the most attractive surface in the world, and it can really take away from your property’s curb appeal.
Using permanent shutters looks more natural on the house, more intentional. The covers come in a variety of materials and colors, ensuring you can find the perfect combination to highlight the beauty of your home rather than take away from it.
It is worth noting that most people do not care about curb appeal when they are trying to protect their homes. However, in many instances, professional-grade covers are more durable than plywood and require less damage to the property to install.
3. Utility Savings
Having coverings installed is also a way to save on utilities, especially heating and cooling. In the warmer months, on especially hot days, you can use the covers to keep the harsh sun and UV rays out of your home, helping to keep your place cool.
4. Increased Resale Value
Finally, if you live in an area prone to violent storms, like hurricanes, installing permanent shutters can improve your home’s resale value. Permanent devices are attractive with a practical purpose. Granted, the resale value might only increase if you are in an area with a high demand for such products.
High winds can lead to significant damage to a house, everything from broken windows to damaged roofs. Storm shutters are only a single means of defense, but they do offer many benefits to the interested homeowner. From safety to resale value, there are few disadvantages to purchasing and installing such products. However, it is crucial to have the items installed correctly to make the most of your purchase. Choosing a DIY approach with little experience might result in sloppy installation and the ultimate failure of the covering, entirely mitigating the usefulness and benefits of the devices.


 24/7 Emergency Service